
How to Install Gas Logs
Follow this simple guide to safely assemble your new log set and revamp your rustic burning display
One of the simplest ways to spruce up the look of your fireplace is by adding a new gas log set.
Gas logs offer a hassle-free and affordable way to enjoy classic wood fireplace ambiance, without all the maintenance. They're clean, convenient to operate, and easy to care for.
Gas log sets come in two styles, Vented and Ventless. Each style will require a different setup, but both will reduce the amount of time and money you'll spend on fireplace upkeep.
Before installing your new log set in an existing wood burning fireplace, you'll need to make sure you have a gas line. If you don't, hire a licensed hearth professional to install one for you.
If you’re just looking to replace old gas logs, use this guide and the manual that comes with your new log set to complete your project!
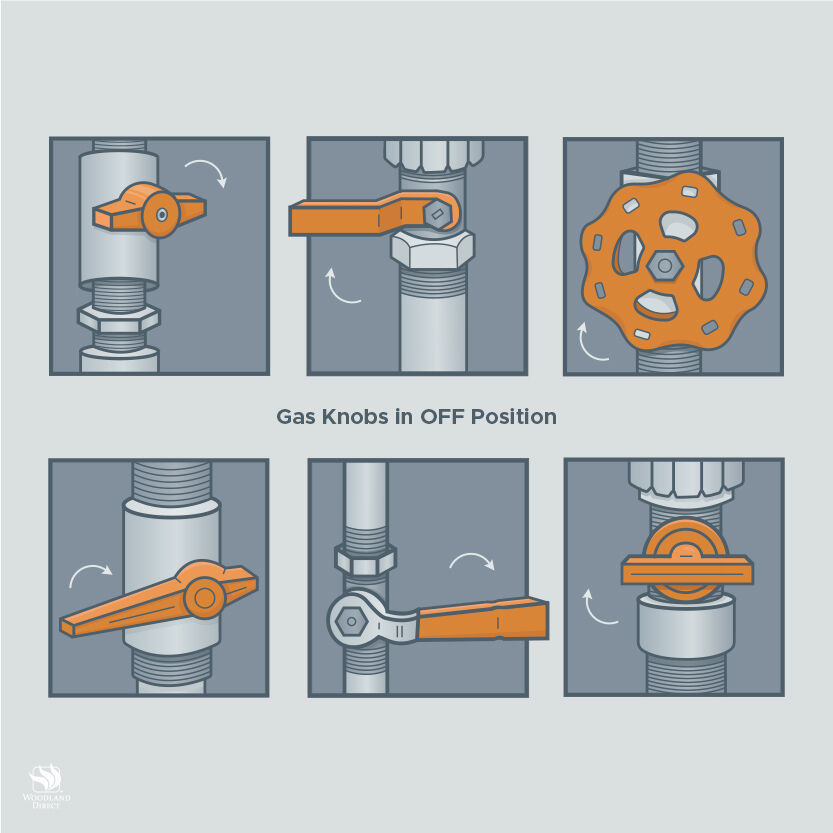
Step 1: Shut off Your Gas Supply
Before you start installing your new log set, turn your gas supply off to prevent leaks. Gas fumes are extremely hazardous and could cause a fire.
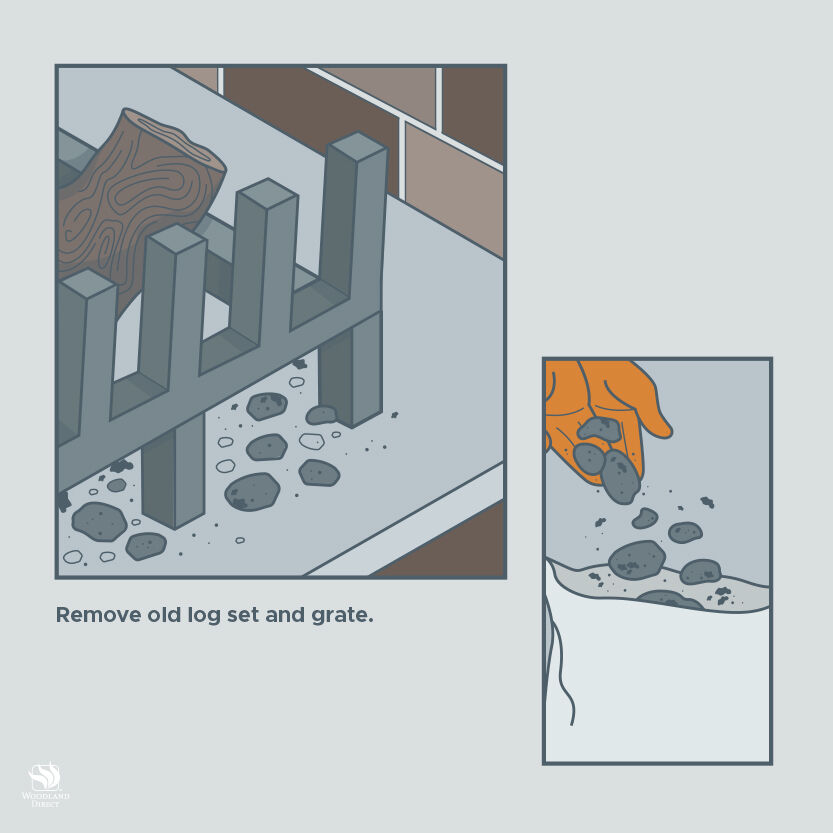
Step 2: Remove Your Old Log Set & Grate
Make sure you have a large, durable bin, box, or trash can nearby.
Put on a pair of heavy-duty work gloves to remove the existing log set and grate from your firebox, then discard it.
Most likely, the grate attaches to the firebox with masonry screws, so you'll need a drill or screwdriver handy.
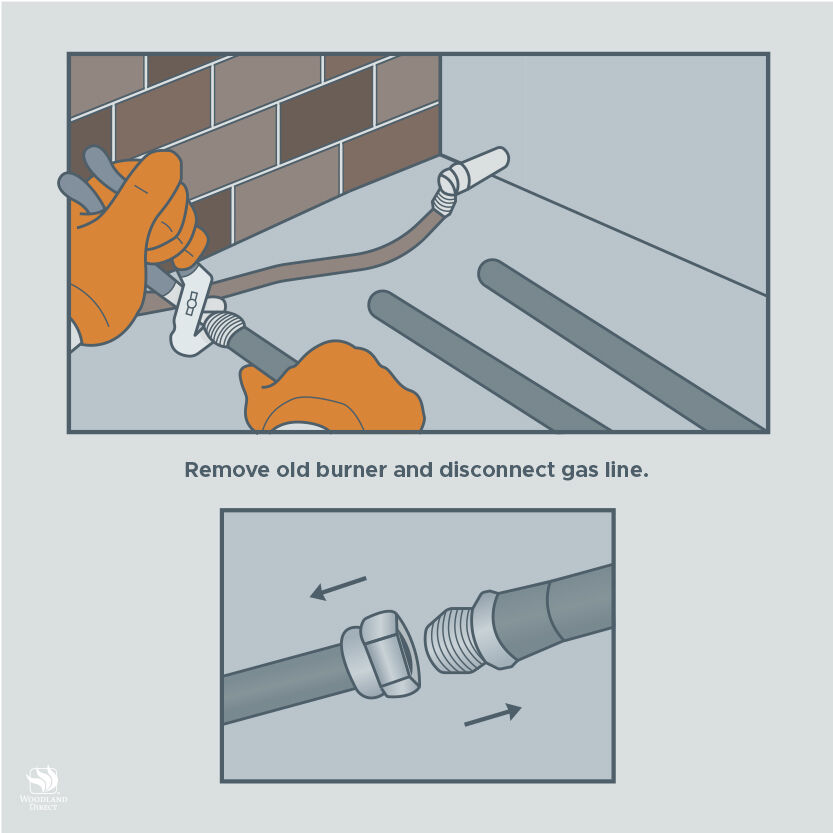
Step 3: Remove Your Old Burner
With your gas supply still turned off, disconnect the gas line from the old burner, then discard the burner.
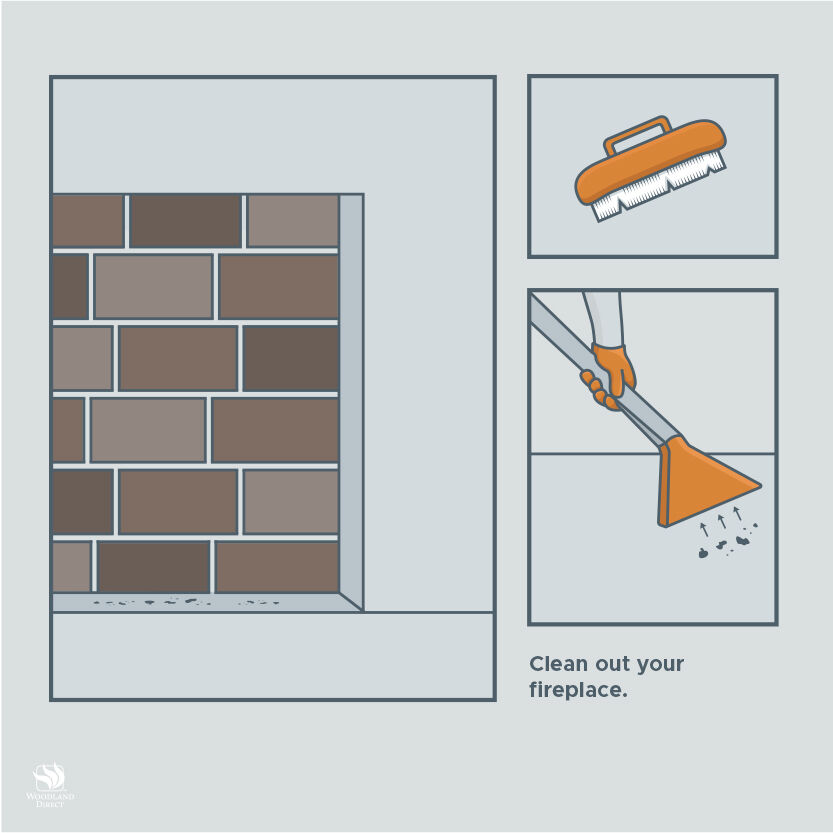
Step 4: Clean Out Your Fireplace
Thoroughly sweep or vacuum debris and soot out of your firebox to limit emissions and ensure peak performance from your new gas log set.
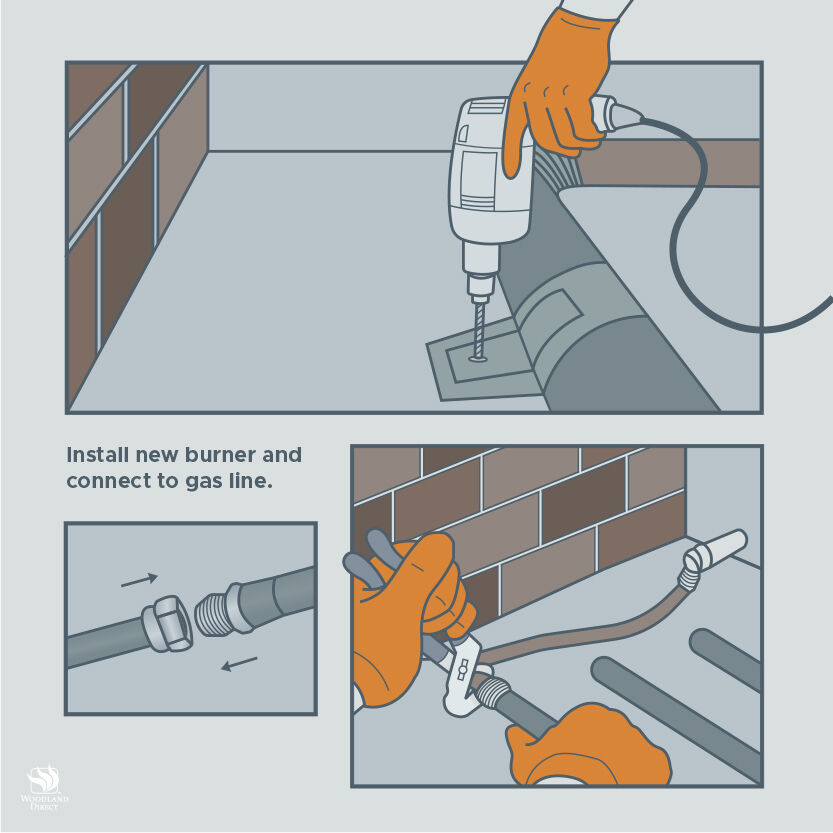
Step 5: Install Your New Burner
Connect your new burner to the gas line, then position it properly. The instruction manual that comes with your log set will tell you exactly how your burner should sit.
Use a masonry bit to drill holes into the firebox, if there aren’t any already. Then, secure the burner into place with masonry screws.
If your gas log set came with a grate, install the new grate directly over your burner.
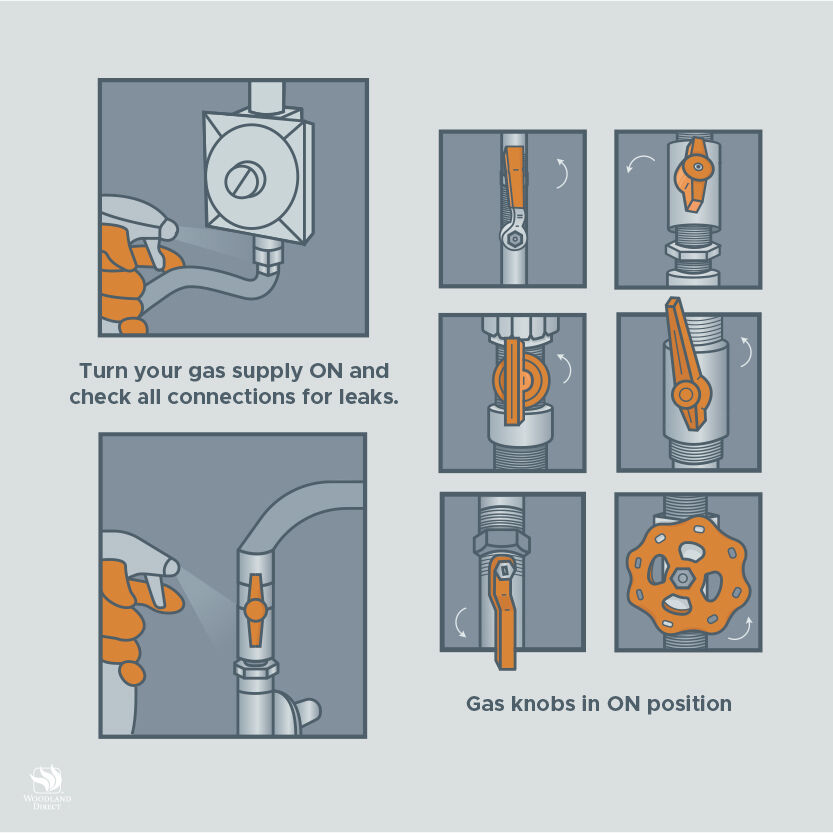
Step 6: Check for Leaks
Turn your gas supply back on, then test all your hoses and connection points to ensure there are no gas leaks.
Step 7: Arrange Your New Logs
If your connections are secure and leak-free, you’re ready to place your new log set onto the burner.
How you’ll arrange the logs will depend on which set you have. Some manufacturers require specific configurations for their gas log sets, especially Vent-Free models.
To ensure the highest possible performance from your gas logs, follow the exact pattern outlined in the installation manual.

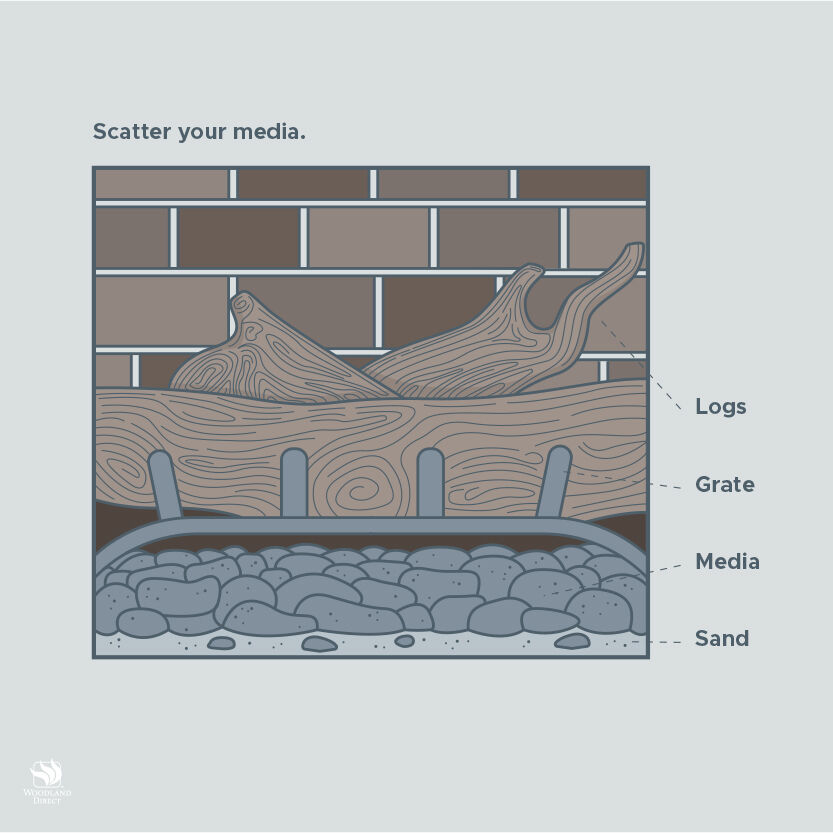
Step 8: Scatter Your Media
Finally, put the finishing touch on your revamped fireplace with burning display media.
You’ll first need to spread a base layer over the burner tubes.
Most gas logs sets include sand for Natural Gas configurations, or vermiculite for Propane. These fire-resistant materials help create a uniform flame pattern across the entire burner and reduce gas pressure.
After laying an even base, distribute embers on top, completely covering the sand or vermiculite.
A thin layer of embers will do the job — adding too many could increase the amount of soot your fireplace produces!
We're Here to Help
If you have any questions about installing a new gas log set, we’d love to help! Call our team of NFI certified experts today at 800.919.1904.
More Resources:
Before you set your sights on a gas log set, read through our gas log buying guide to learn which options are best for your firebox.
If you're looking for a great alternative to an authentic wood burning fire, here are 6 reasons why gas logs are the way to go.
Still have some questions? We’ve provided expert answers to some of the most common questions about gas logs.